Grok Build is an AI coding tool that runs in a terminal, the text window where you type commands, and it can read and change the files in a project folder. That makes it a different product from Grok chat in the browser. Install it in a practice folder, sign in, ask one question that only reads, and make one tiny change that you review yourself, all before you point it at anything that matters.
Imagine a coworker asks you to install Grok Build and fix an urgent problem before tonight. You have a copy of the live project on your desktop, and one file in it still holds a real password. A brand-new tool that can read and change files would be one step away from it. Starting in a practice folder avoids that.
Product names, plan labels, and who can sign in still move around. Treat the notes below as a field guide from vendor pages checked in August 2026. Re-check x.ai/build and the Grok Build overview the week you roll this out to a team. The launch post on May 25, 2026 said SuperGrok and X Premium Plus subscribers could install the early beta, so confirm that on the live page before you promise seats to anyone.
What Build puts on your machine
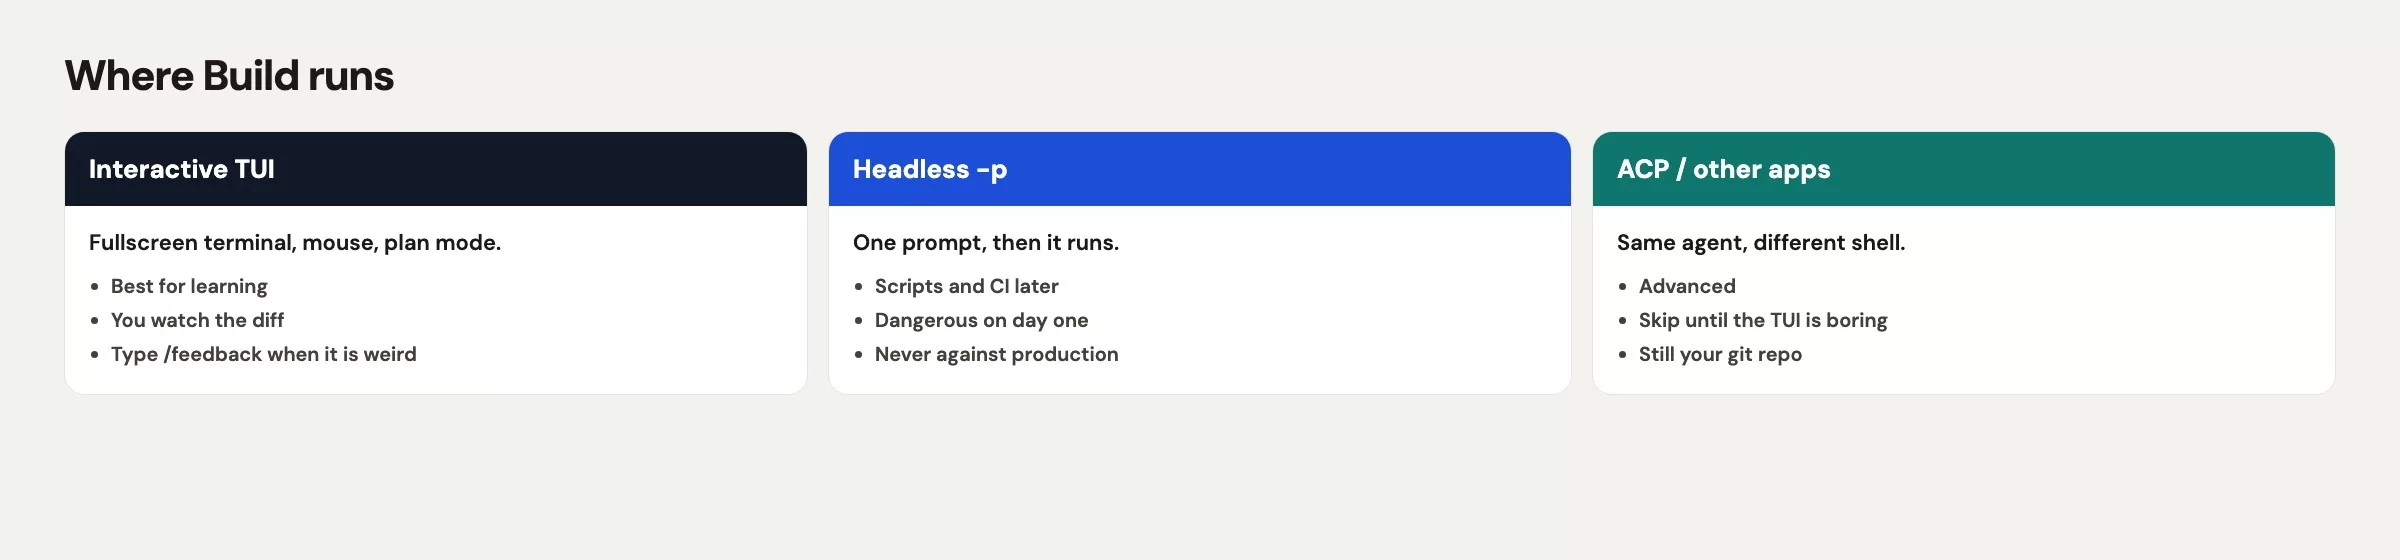
Grok Build is a coding agent you run from a terminal. The main screen is called a TUI, short for text user interface, which fills the terminal window, supports the mouse, and has a prompt at the bottom. You can also run it without that screen by typing grok -p and a single prompt, or use it inside other apps through the Agent Client Protocol (ACP). The same family of model that powers the agent, Grok 4.7 according to the Grok Build overview in October 2026, is also available to your own programs through xAI’s API, the connection software uses instead of a chat window. That path is a different bill. Do not assume a chat subscription and API credits share one wallet.
The install gives you a grok command. It does not give you a second copy of grok.com, and it does not turn your whole hard drive into a playground unless you start the command in a wide folder. The folder you start in decides how much the agent can see and change. If you type grok in ~/Desktop, the agent can see every project you left there, including the 2.1 gigabyte production copy from last night.
Once it is running, Build can read files, propose edits, run shell commands that you approve, and pick up the conventions of a project. The official docs say it reads AGENTS.md, skills, plugins, hooks, and extra tool servers (Model Context Protocol (MCP) servers) in the project. You do not need any of that on your first night. You need a practice folder, a login, and a habit of watching the first changes it proposes.
Rule of thumb: Chat answers with words, while Build works in a folder. Open Build only in a directory you would let a new contractor browse.
Public branding on xAI pages also moves, and some marketing currently says SpaceXAI. In this series we say xAI and Grok, and if a screenshot in a vendor blog shows a different parent name next month, the command is still grok.
Installing on each operating system
Use the official install script, and do not grab a random zip file that a coworker forwarded in chat. On macOS or Linux, run this:
curl -fsSL https://x.ai/cli/install.sh | bashOn Windows PowerShell, run this instead:
irm https://x.ai/cli/install.ps1 | iexThose two lines were the vendor’s install commands in August 2026. They download a script and run it, which is normal for this product and still worth a pause on a locked-down work laptop. If your security team keeps an approved-software list, send them x.ai/build and wait for an answer. A private install on a personal user account, pointed at a company project, is how the next ticket starts.
After the script finishes, open a new terminal tab so your PATH (the list of places your computer looks for commands) picks up the new program. Then check that the command exists:
which grok
grok --help
If which grok prints nothing, your shell is still using the old PATH. Quit Terminal or Windows Terminal completely, reopen it, and try again. If help text appears, you have the program installed, but you do not yet have a safe session.
Your settings live in ~/.grok/config.toml on Mac and Linux, and in %USERPROFILE%\.grok\config.toml on Windows. You do not need to write that file by hand tonight, but it helps to know the path so you can find models, extra tool servers, and plugins later. A project can also carry its own .grok/config.toml. The official docs put most personal model settings in your user file and keep the project file for things like extra tool servers and plugins. Labels move, so grok inspect will tell you what this version actually loaded.
Your first grok in a practice folder
Do not start in warehouse-sync-prod-0817. Make a toy folder, or clone a throwaway copy that has no secrets in it. A production copy on your Desktop is a trap, because the name looks harmless (“sync”) and the .env file is already sitting there.
A practice folder that is good enough for a first run has these four traits:
- It is a folder you created today, with a tiny readme file and one Python or JavaScript file.
- Or it is a fresh git clone of an open sample, with no production
.envfile. - Git is set up in it, so you can see a diff (a list of what changed) and roll back.
- It holds no customer exports, no payroll spreadsheets, and no VPN (a private network connection many companies require for work systems) secrets.
Here is an example:
mkdir -p ~/sandbox/warehouse-export-toy
cd ~/sandbox/warehouse-export-toy
git init
printf '%s\n' '# toy export' > README.md
git add README.md
git commit -m "start toy sandbox"
grok
That last line opens the TUI in this folder. If you already have a small internal sample project, clone that instead and skip the printf lines. The point is the cd command, because the agent inherits your current directory. Starting in ~ or ~/Desktop is how yesterday’s 2.1 gigabyte copy ends up in the agent’s view.
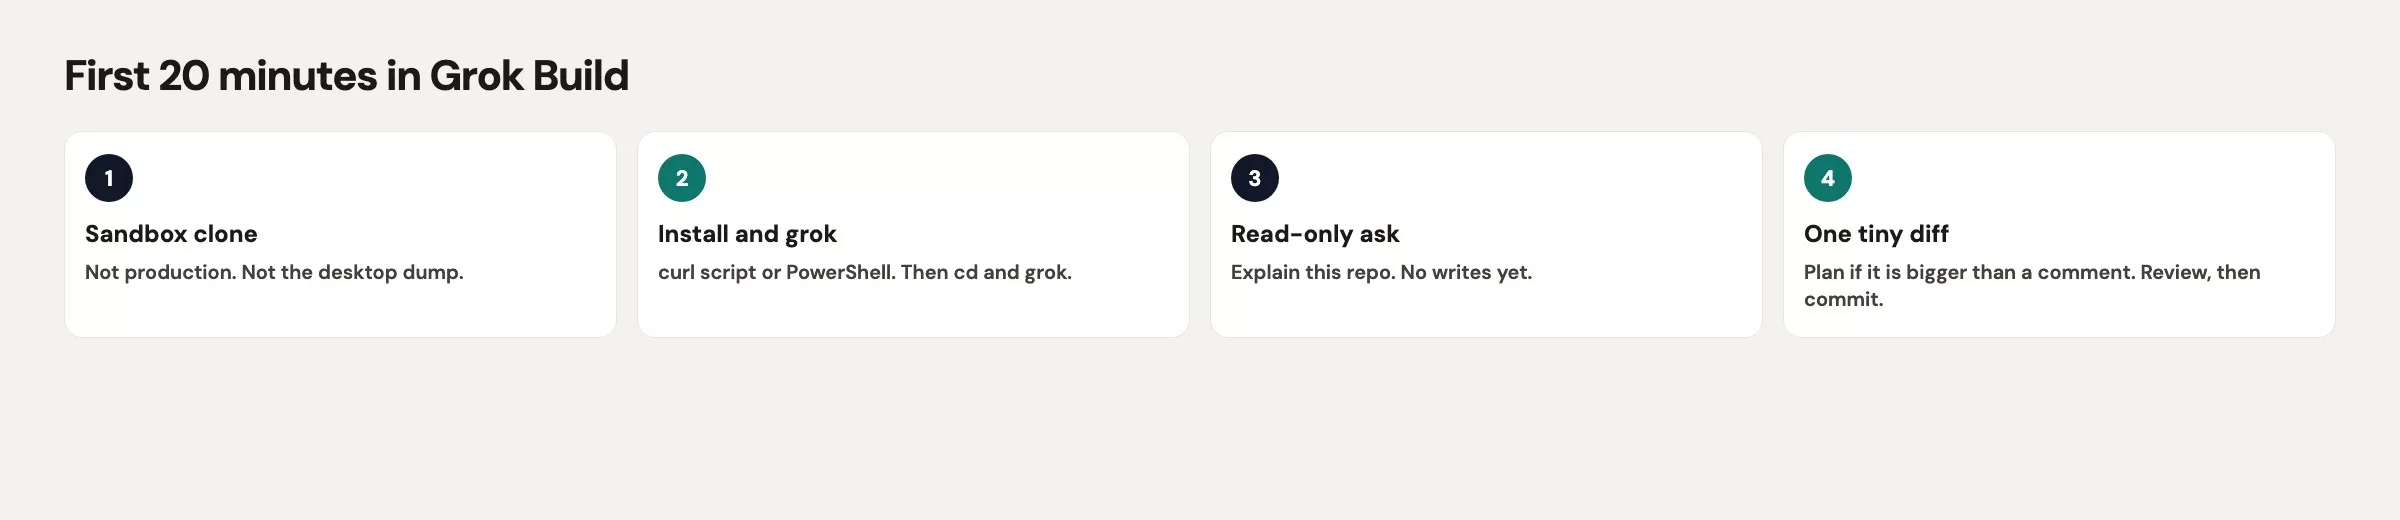
The official first prompts in the docs are boring on purpose: “Explain this repo,” and “Walk me through this file” with an @ path. Boring is correct. A first prompt that says “fix production and push” skips the only night you will still be careful.
Signing in with a browser or an API key
On first launch, Grok opens a browser so you can sign in. That is the path for a normal laptop with SuperGrok or X Premium Plus access, which is how it was marketed at the May 2026 launch, so re-check it. Finish the browser steps and come back to the TUI. If the browser tab sits on an error, do not keep retrying inside a production copy, and fix the sign-in in the practice folder instead.
Some machines have no browser, such as servers you reach over a remote login and automated build machines. The official docs say to export an API key (the secret code that links the tool to your account) and then start grok:
export XAI_API_KEY="xai-..."
grok
Create that key in console.x.ai. Chat subscription money and API credits are separate systems, so a SuperGrok login in the browser does not automatically pay for XAI_API_KEY usage. If you paste a real key into a screenshot, a public note, or a chat thread, rotate it right away. The placeholder in this post is xai-... on purpose.
For a one-shot question without the TUI, you can type this:
grok -p "Explain this codebase"This no-screen mode is useful later for scripts, but it is a poor teacher on your first run because you lose the approve and deny prompts that you still need to see. Stay in the TUI tonight, and save grok -p for a prompt you would let run without a human hovering, which on night one is almost nothing.
If login works and the TUI is up, run inspect from a second terminal in the same folder, or use the inspect command the client exposes:
cd ~/sandbox/warehouse-export-toy
grok inspect
Inspect lists what Grok discovered: config sources, instruction files, skills, plugins, hooks, and extra tool servers. On a fresh toy project the list should look thin, and that is a good sign. If your first inspect already shows nine tool servers and a browser plugin, you started in someone else’s fully loaded project, so back out. You wanted a practice folder, not a Christmas tree.
Here is what a clean first inspect can look like. This is a toy example, and the labels will vary.
| Inspect item | Clean sandbox | Why you care |
|---|---|---|
| User config | ~/.grok/config.toml | Personal models and defaults |
| Project config | none yet | No surprise MCP on night one |
| Rules / AGENTS.md | none yet | You have not written house rules |
| Skills / plugins / MCP | 0 / 0 / 0 | Nothing extra is waiting to hang the session |
Plan mode in one paragraph
Plan mode means planning comes first. The agent writes a plan that you can approve, comment on, or rewrite before it edits anything else in the project. In the TUI, enter it with /plan (with an optional description) or cycle through modes with Shift+Tab, and reopen the plan later with /view-plan. The official docs say the file-edit gate is independent of permission mode. That means even if you later turn on a more automatic approval setting, plan mode still holds ordinary file edits until you accept the plan. Use it the moment the task is bigger than “rename one function,” and skip it for a question like “what does the readme say.”
A first-run ritual
Permission language in the product is still moving. In August 2026 you will meet some mix of ask (you watch and approve each tool), auto (a filter lets boring tools through), and always-approve (it skips prompts, though deny rules and hooks still apply). Default to ask and approve, do not start your first run in always-approve, and do not hand a “clean unused files” prompt to the no-screen grok -p mode on a laptop that still holds production files.
| Permission vibe | When to use |
|---|---|
| Ask / watch (default) | First week, any folder you care about, any prompt that might edit |
| Auto (classifier) | After you trust this repo and the task is small and local |
| Always-approve | Almost never on first run; never against prod or a secrets directory |
Headless grok -p | After you have a prompt you would let run without hovering; not tonight |
Do the ritual in order, and if you skip a step, start over. The warehouse export can wait 20 minutes, while a bad first session can cost you the evening.
- Confirm you are in the practice folder with
pwd. If you seewarehouse-sync-prod-0817,cdout of it. - Run
git status. A messy folder with leftover secrets is not a first-run folder. - Start
grok. Finish browser sign-in, or setXAI_API_KEYonly if you have no browser and you understand that this uses API money. - Run
grok inspect. If the list is crowded, you are in the wrong folder. - Ask one question that only reads: “Explain this repo in one screen. Do not edit files.”
- Ask for one tiny change: “Add a single sentence to the readme file that says this folder is a toy sandbox. Do not touch other files.”
- Read the diff. If the agent also “helpfully” rewrote punctuation in three other files, reject those changes.
- Keep or discard the change with git. Rollback is a git job, not a magic undo button inside the TUI.
A first question that only reads trains you to see how the agent looks at the project. A one-sentence readme edit trains you to read a diff while the stakes are still a toy folder. If both go well, stop and close the TUI with /quit, because the first run is over. Your coworker’s message can get an honest reply: “The tool is installed. I will touch the real export tomorrow in a branch, with plan mode on.”
If you want a slightly richer toy than a readme, add a five-line Python file and ask the agent to add a docstring. The same rule applies: one file, one change, and you read the diff. Do not paste Tuesday’s staging password into the prompt “for context.”
Common mistakes
| Mistake | What happens | Do this instead |
|---|---|---|
Install, then cd into last night’s prod clone | Agent can see .env, exports, and 2.1 GB of history | Sandbox folder first, then grok |
| Treat SuperGrok login as API credit | Headless runs fail or bill a second wallet | Browser auth for the TUI; Console key only when you mean API |
| First prompt is “fix everything” | Wide diffs you will not finish reviewing by the deadline | Read-only question, then one file |
| Always-approve on night one | Shell commands run while you are still reading the docs | Watch and approve |
Skip grok inspect | You inherit someone else’s MCP and plugins | Inspect, then decide |
What to do tonight and what to do next
Tonight, install with the official script, open a practice folder, sign in, inspect, ask one question that only reads, land one tiny readme sentence, and stop. Tomorrow, pick a second toy file and practice the loop this series uses next: explore, change, check. That loop is the topic of Grok Build project loop: explore, change, check, the next post in the Grok series. If you still mix chat tabs with the folder agent, reread the four ways to use Grok before you point Build at work code.
If your company has not approved the command-line tool, do not sneak it onto a laptop that holds customer data. Send your team the official install page, name the practice-folder rule, and wait. The export ticket will survive one more morning, but a leaked staging password might not.
Quick recap
- Install with
curl -fsSL https://x.ai/cli/install.sh | bash(Windows:irm https://x.ai/cli/install.ps1 | iex). - The command is
grok, and your settings live in~/.grok/config.toml. - Start only in a practice folder, because yesterday’s Desktop copy is not one.
- Use browser login for the TUI, and use
XAI_API_KEYonly when there is no browser and you mean API spend. - Run
grok inspect, ask a question that only reads, then make one tiny reviewed edit. - Use plan mode (
/planor Shift+Tab) before any task that might touch more than one file. - Launch eligibility in May 2026 was SuperGrok and X Premium Plus, so re-check before you brief the team.
Series notes
This is Part 16 of the Grok series. Everyday chat lives in a browser tab, and Grok Build is the terminal coding agent. Earlier posts map the four ways to use Grok.
Sources
Research and further reading used for this article:
- xAI: Grok Build (install command and product home)
- xAI docs: Grok Build overview (TUI,
grok -p,config.toml,grok inspect, first prompts) - xAI: Introducing Grok Build (May 25, 2026 launch, SuperGrok and X Premium Plus note, plan mode,
/feedback) - xAI docs: Grok 4.6 (model that powers Build, checked August 2026)
- xAI Console (API keys when you need
XAI_API_KEY) - xAI: Grok FAQ (plan and product questions to re-check)
- Analytics Made Simple: Learn (other paths on this site)
Keep going
Same lessons in your feed
Short diagrams, hooks, and weekly tutorials on Substack, Instagram, X, and Facebook.