
When one word in an AI-generated image is wrong, do not start over from nothing. Keep the version that is mostly right, point at the exact part that is wrong, attach a reference picture if you have one, and limit yourself to three edit passes. Twelve fresh generations in a row will drift in color, props, and spelling, because each one is a new roll of the dice.
Say you have a photo of a coffee mug that is almost right. The handle is in shadow, and the paper sleeve around the mug says DOK 4 instead of DOCK 4. The teal glaze is supposed to match your brand color, which is #0F766E (a code that names one exact shade of teal). It is evening, you are tired, and the tempting move is to hit generate again.
Why starting over drifts
Each new generation makes up a fresh scene from your words. Your words did not change, but the scene did, and that is why the mug walks away from #0F766E. The model is not holding a paint chip in its hand unless you give it one as a reference. If the table, the window, and the plant looked good the first time, those pixels are worth keeping. Throwing them away because the sleeve lettering is wrong is like rewriting a whole database query (a request that asks a database for data) because one label is misspelled.
Drift shows up in four ugly ways. Color slides toward a neighbor, so teal becomes mint and then forest green. Counts change, so one mug becomes two. Lettering mutates from DOCK 4 to DOK 4 to a squiggle. And fake marks appear on empty plastic because the model has learned that product photos often have logos. If you keep rerolling, you train yourself to accept “close enough,” and close enough is how a stray mermaid logo ends up on a product listing.
So keep the first version, give it a name, and edit that one. Only throw the file away if the scene itself is the problem, such as the wrong room, a realistic person you did not ask for, a city skyline, or a wall of logos. A bad scene gets a new generation from the same written brief, and a local defect gets a pointed edit.
Point at the region
The Image 2.0 model in Grok Imagine (in its Quality Mode, according to xAI’s announcement in August 2026) adds tools that change only the part you mean and leave the rest alone. xAI describes a magic wand that selects the region you point at, and a segmentation tool that makes a more precise selection. The button in the live app may say wand, region, select, or something newer. The habit stays the same: isolate the sleeve, the handle, or the wall, then describe the change in one sentence.
Good region prompts are boring, and that is what makes them work.
On the paper sleeve only: replace the letters with exactly DOCK 4 in bold sans-serif, black on cream. Do not change the mug glaze, handle, table, or plant.Bad region prompts invite a reroll, such as “make the product look more premium and fix the text.” Premium is not a region you can point at, and “fix” does not say which letters should appear. The model will try to help by changing the glaze, adding a lid, and inventing a badge.
Make one change per pass. Fix the lettering first if it is wrong, then the color, then the handle shadow. If you stack three requests into one edit, you will not know which instruction caused the new mint glaze. You will then start over from zero in a bad mood, and you are right back where you began with twelve files and no listing.
Rule of thumb: If you cannot circle the mistake with a finger, you are not ready to edit. You are ready to rewrite the brief.
Reference images
Words are weak at describing “this exact teal” or “this exact mug shape,” while a photo is strong at both. Multi-reference editing lets you attach source images so the model can copy a subject, a color palette, or a layout instead of guessing. The number you can attach depends on where you are working. xAI’s Image 2.0 post for the consumer app says up to 5 input images in one generation, while the Imagine developer docs mention up to 3 references on some edit routes. Check the control you are actually using, and do not promise five in a script (a small program) that calls the API (the way a program asks Imagine for images) until you have read the live documentation for that route.
Three things are worth attaching:
- A crop of a real mug you already photographed, or a product shot you own
- A color chip, saved as a PNG image file, of
#0F766E(a plain rectangle you made in any editor) - The first version of the image, if you are placing a corrected sleeve onto the same table
Some things should never go in: a competitor’s product page, a celebrity, a coworker’s headshot without written consent, a Disney still, or a logo sheet you found on Google Images. Reference images are not a loophole around copyright or consent, and the last Imagine post in this series covers the rights question in full. A good test is this: if you would not put the source file in a shared drive with your legal team copied, do not drop it into Imagine.
Say what each reference is for, for example “Image 1 is glaze color only. Image 2 is mug shape. Ignore any text in the references.” If you stay silent, the model may copy a watermark or a store sticker from the source and treat it as texture.
Background and resize
Removing a background is a different job from “make the room nicer.” Use it when you need the mug on a transparent field, so a designer (or you, in a slide) can drop a solid color behind it. Do not ask the model to invent a marble showroom if your listing template already has a cream tile, because invented rooms bring invented windows, invented plants, and sometimes invented logos on the windowsill.
Smart resize, another Image 2.0 tool, recomposes one image into a different shape: 1:1, 4:5, 9:16, 16:9, and other options in the live app. That is how a wide table scene becomes a square listing photo without you stretching the mug into an oval. Ask for the shape you will actually ship, then inspect the result, because resize can invent extra table at the edges and can crop a title if you were unwise enough to put lettering in the photo. Keep the subject whole. If the mug is the product, the mug must stay fully in frame, since a chopped handle looks like a bug.
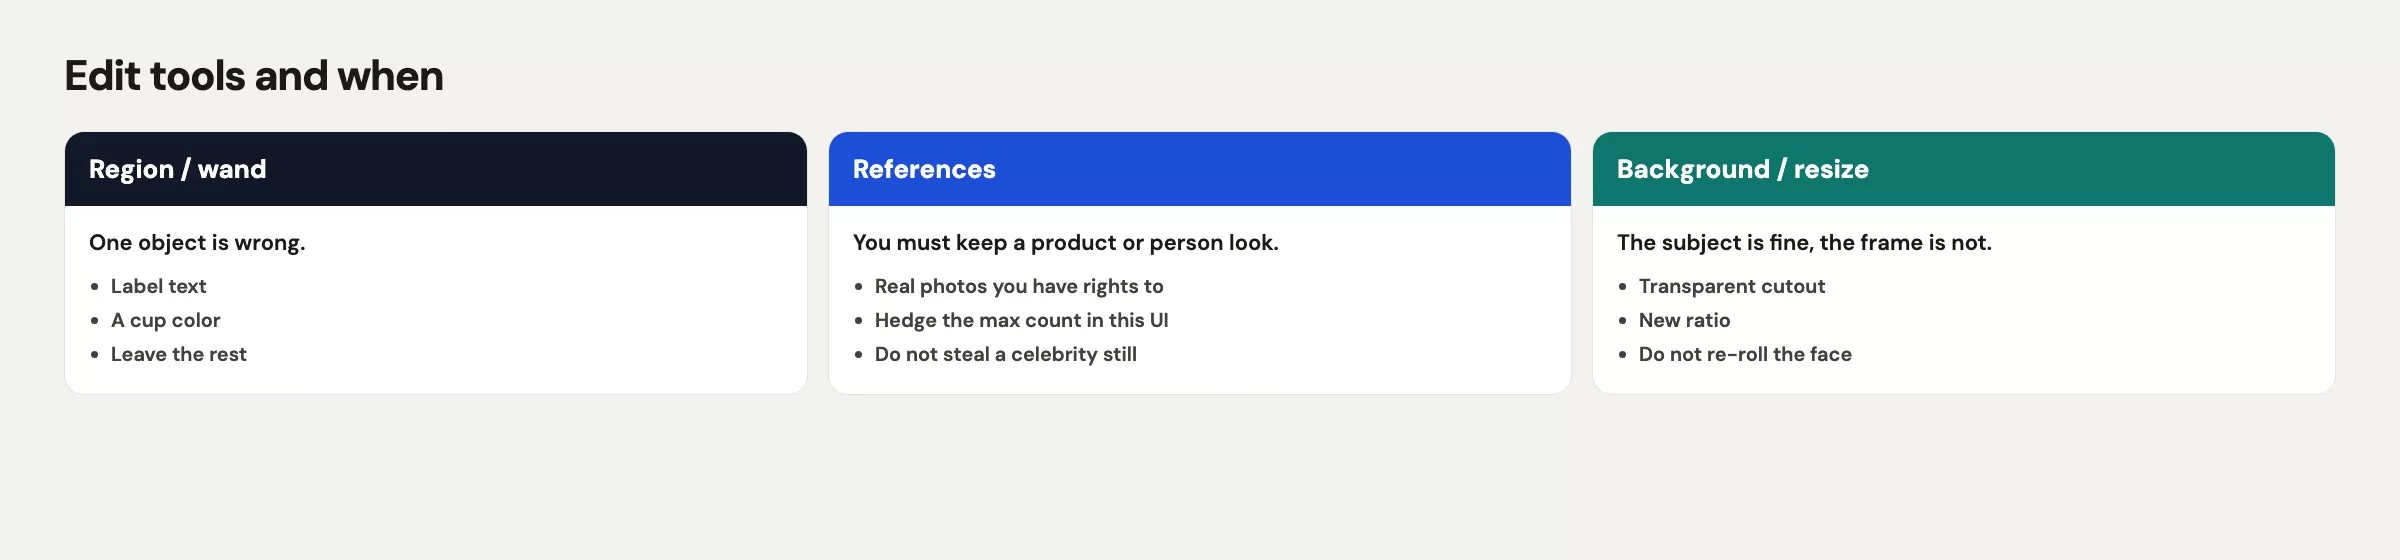
Treat resize as the third pass, not the first. Fix the letters and the glaze in the original frame, then recrop. If you resize a misspelled sleeve first, you end up with a crisp square picture of a wrong word.
| Tool | Use when | Skip when |
|---|---|---|
| Region / magic wand | One object is wrong (sleeve type, handle shadow, wall outlet) | The whole room is the wrong brief |
| Segmentation | You need a cleaner mask than a rough wand (mug only, no table) | You have not tried a simple region pass |
| Reference images | Exact color, exact shape, or a layout you already like | The ref is a brand, person, or character you may not use |
| Background removal | You need a cutout for a template you already have | You want the model to dream a new store |
| Smart resize | Same scene, new ratio (16:9 to 1:1) | Type is still wrong, or the subject would be cropped |
| New generate from same brief | Scene junk: wrong room, extra people, logo wall | Only the sleeve letters are wrong |
A three-pass budget
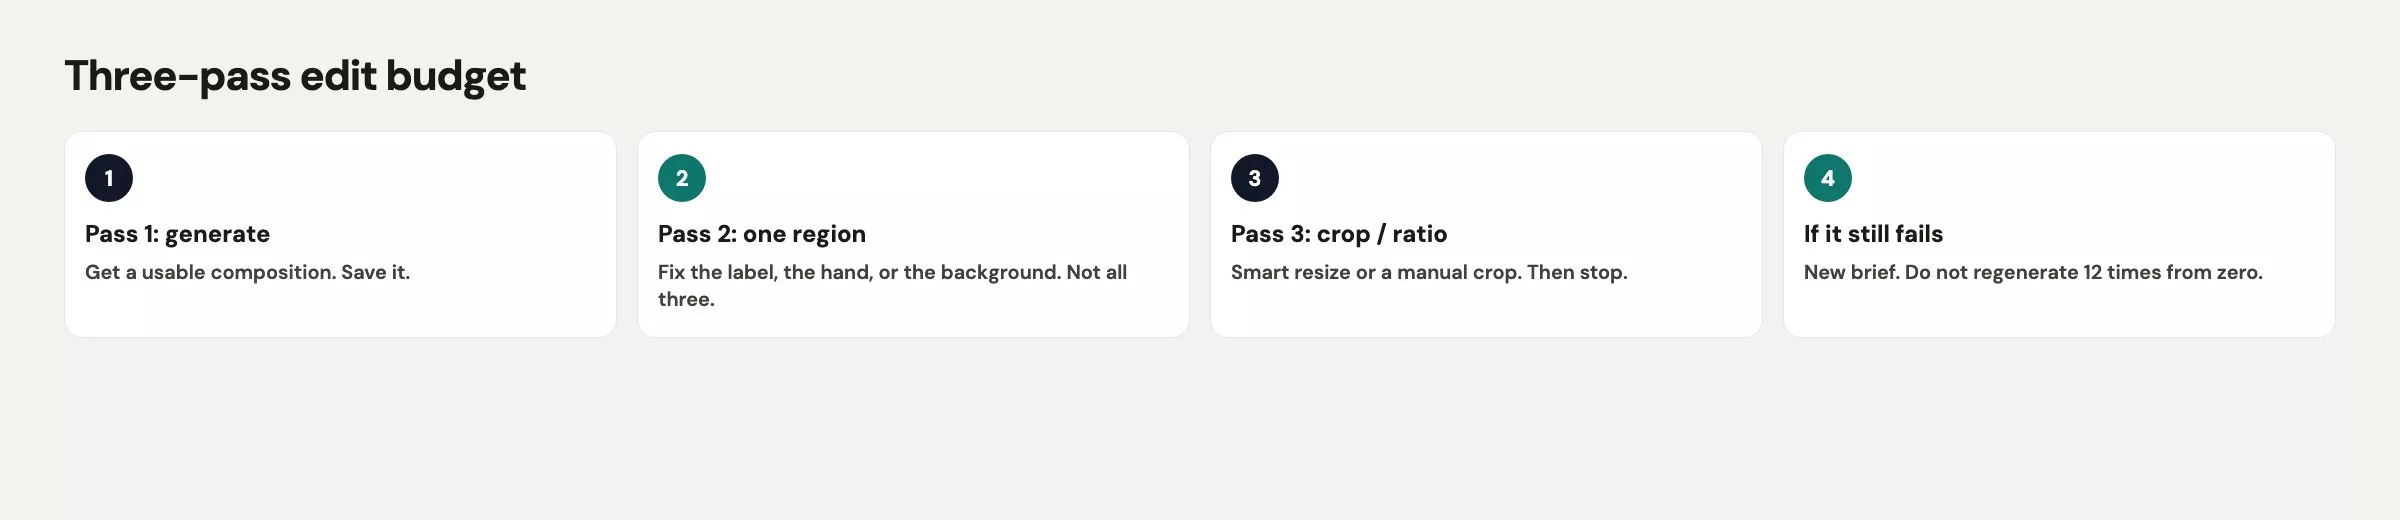
Give yourself three edits after you have a version worth keeping. Write the three requests in a note before you touch the wand, then stop when they are done. Chasing perfection is how twelve regenerations happen. Good enough means a sleeve that spells DOCK 4, a glaze in the right teal family, and a shape that matches the listing tile.
- Pass 1: the lettering, or whichever local defect you can circle.
- Pass 2: color or shape, with a reference image if you have one.
- Pass 3: a background cutout or a smart resize to the shape you will ship.
If pass 1 ruins the table, undo it, and do not turn “fix the table” into a fourth adventure. Go back to the first version. If the app has no undo button this week, you still have the file you downloaded, which is why you should download after every pass that keeps the image usable. Name the files so you can tell them apart: mug-teal-v1.png, mug-teal-v1-sleeve.png, mug-teal-v1-sleeve-1x1.png. Filenames are cheaper than memory.
Stop when the listing can go live without embarrassment. A slightly dark handle is a photographer’s complaint you can live with, but a misspelled sleeve is a customer complaint and a fake logo is a legal problem. Rank your taste against that list, and spend your passes on the worst problem first.
Worked edit: label and crop
This is a made-up job: a square tile for an internal merchandise drop. The product name in your sheet is AMS-MUG-TEAL, the glaze target is #0F766E, and the sleeve text must read exactly DOCK 4. You already have a wide 16:9 image from an earlier brief in this series (a table, a window, one mug, no people). The sleeve says DOK 4, the glaze looks a bit blue, and the listing slot is square.
For pass 1, use a region edit on the sleeve only:
Edit the paper sleeve only.
Replace all letters with exactly: DOCK 4
Bold sans-serif, black ink, cream sleeve, centered.
Do not change mug shape, glaze, handle, table, plant, or window.
Now zoom to 100% and read the letters aloud: D, O, C, K, space, 4. If you see D0CK (with a zero) or DOOK, repeat pass 1 on the sleeve. Do not touch the glaze yet.
For pass 2, fix the color with a chip. Make a 200 by 200 pixel PNG filled with #0F766E in any editor and attach it as a reference if the control allows. Point at the glaze, not the sleeve.
Mug glaze only: match the attached color chip #0F766E.
Keep the sleeve text DOCK 4. Keep the handle shape. No extra logos on the ceramic.
For pass 3, use smart resize to a square. Ask the model to recrop so the mug stays fully in frame, handle included, with a little table showing. Then look at the edges for invented outlets, extra mugs, or a second sleeve. If the square looks clean, export ams-mug-teal-1x1.png and stop. You will still have a wishlist, such as a brighter window or less grain, but a wishlist does not earn a fourth pass unless your legal team or the listing template blocks you.
This table shows what a clean result looks like at each step:
| Pass | You asked | Ship check |
|---|---|---|
| v1 (kept) | 16:9 table scene, one mug | No people, no fake marks, sleeve wrong |
| Pass 1 | Sleeve = DOCK 4 | Letters read correctly at 100% |
| Pass 2 | Glaze toward #0F766E | Teal family, not mint, not navy |
| Pass 3 | Smart resize 1:1 | Full handle, no extra mug at the edge |
Common mistakes
- Running twelve from-scratch generations because one word was wrong. Edit the word instead.
- Stacking three requests into one wand pass, so you cannot tell what broke the glaze.
- Resizing a misspelled sleeve into a crisp square of the same typo.
- Attaching a competitor’s product shot as a “style reference” and shipping a lookalike mark.
- Assuming the consumer limit of 5 references is the same on every API edit route. Check the control you are using.
- Never downloading the first version, then losing the only good table when pass 2 turns the glaze mint.
- Inventing a marble kitchen with background tools when the template already has a cream tile.
Quick recap
- Starting over from zero drifts color, counts, lettering, and stray marks. Keep the first version if the scene is good.
- Circle the defect, edit one region at a time, and inspect at 100%.
- Reference images hold color and shape. Expect 5 in the consumer studio and possibly 3 on some API routes.
- Cut out a background only for a template you already have, and resize last.
- Use three passes, download each one, and stop when the tile can ship.
How to practice this week
Take one image worth keeping from the earlier Imagine post in this series, or a photo you own. Write your three passes on paper, run only those three, and download after each pass that keeps the image usable. If you still want a fourth change, wait until tomorrow, because taste inflates late in the evening.
The next post covers Grok Imagine video and motion, and how to do it without burning your budget: get the still right first, then make a short clip with one camera move. Clips run from a few seconds up to about 15 seconds. The hub for this whole topic is the Grok series, and a related caution is in the post on Grok privacy and work.
Series notes
This is Part 22 of the Grok series. Previous: Imagine from zero. Next: Imagine video and motion.
Sources
Vendor pages checked in August 2026. Research and further reading used for this article:
- xAI: Imagine Image 2.0 (region edits, segmentation, background removal, multi-ref up to 5 on consumer, smart resize)
- xAI docs: Imagine overview (edits, multi-image notes, some endpoints mention up to 3 refs; hedge)
- Grok Imagine (Quality Mode studio)
- xAI Console (API keys if you automate edits; separate from chat plans)
- xAI API (model id
grok-imagine-image-2.0) - Analytics Made Simple: Grok series
- Analytics Made Simple: Learn
Keep going
Same lessons in your feed
Short diagrams, hooks, and weekly tutorials on Substack, Instagram, X, and Facebook.